
If you are subscribed to NordVPN, you can use their Meshnet feature to enable Screens 5 to connect to your computers securely, no matter where they are in the world. Meshnet functions like a secure local area network (LAN), allowing devices to connect directly and safely.
⚠️ Disclaimer
NordVPN Meshnet is a third-party service and is not developed or maintained by Edovia. We provide this guide as a convenience for users who wish to use Meshnet with Screens, but we cannot provide support for Meshnet configuration, connectivity, or troubleshooting.
Screens simply connects to the IP address and port provided. If the remote computer is reachable through Meshnet, Screens should be able to connect to it just like any other network address.
If you experience problems reaching your remote computer through Meshnet, we recommend first verifying the connection using NordVPN's own instructions and contacting NordVPN Support if necessary.
NordVPN may also change how Meshnet works at any time, so some information in this guide may become outdated.
Prerequisite
Before setting up NordVPN, ensure your computer is already configured to accept screen sharing connections. You can find detailed step-by-step instructions in the “Preparing Your … for Screen Sharing” articles located in this section.
Step 1: Install NordVPN
Install NordVPN on:
- All devices you'll be connecting from (e.g., your iPad or laptop).
- All computers you'll be connecting to.
For installation guides, refer to the NordVPN Setup Tutorials.
Step 2: Enable Meshnet
Enable Meshnet on all relevant devices and computers. Follow the instructions in the NordVPN Meshnet Docs.
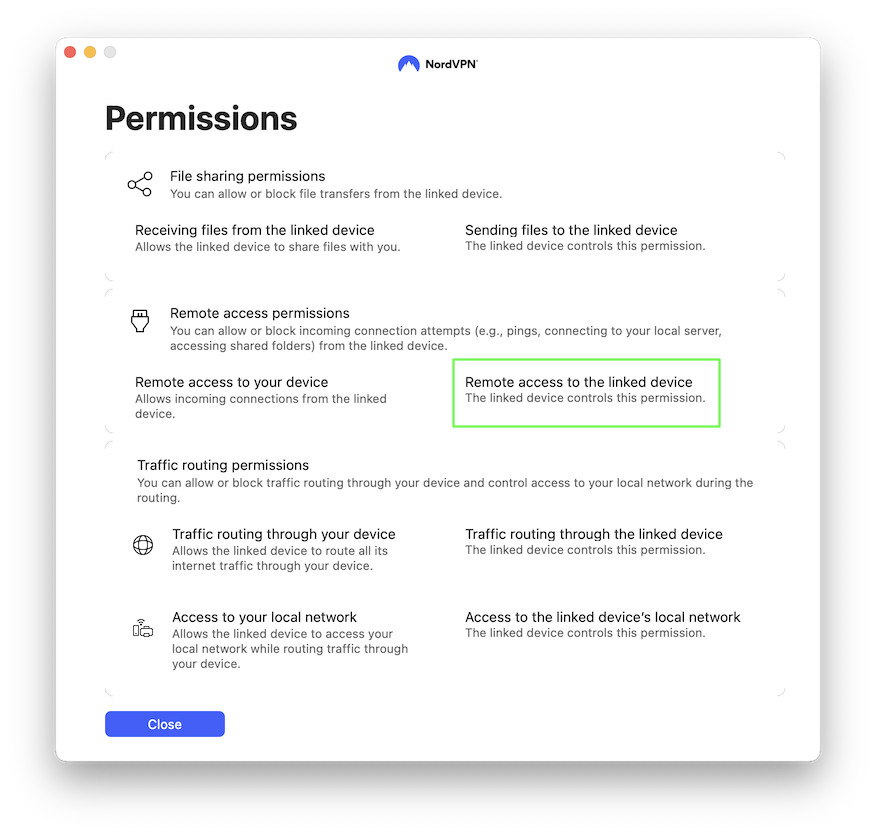
Additionally, ensure that remote access is enabled on the computer you’ll be connecting to:
Step 3: Gather Connection Information
In the Meshnet settings of NordVPN, locate the IP address for your computer. It is displayed at the top of the Meshnet settings page:
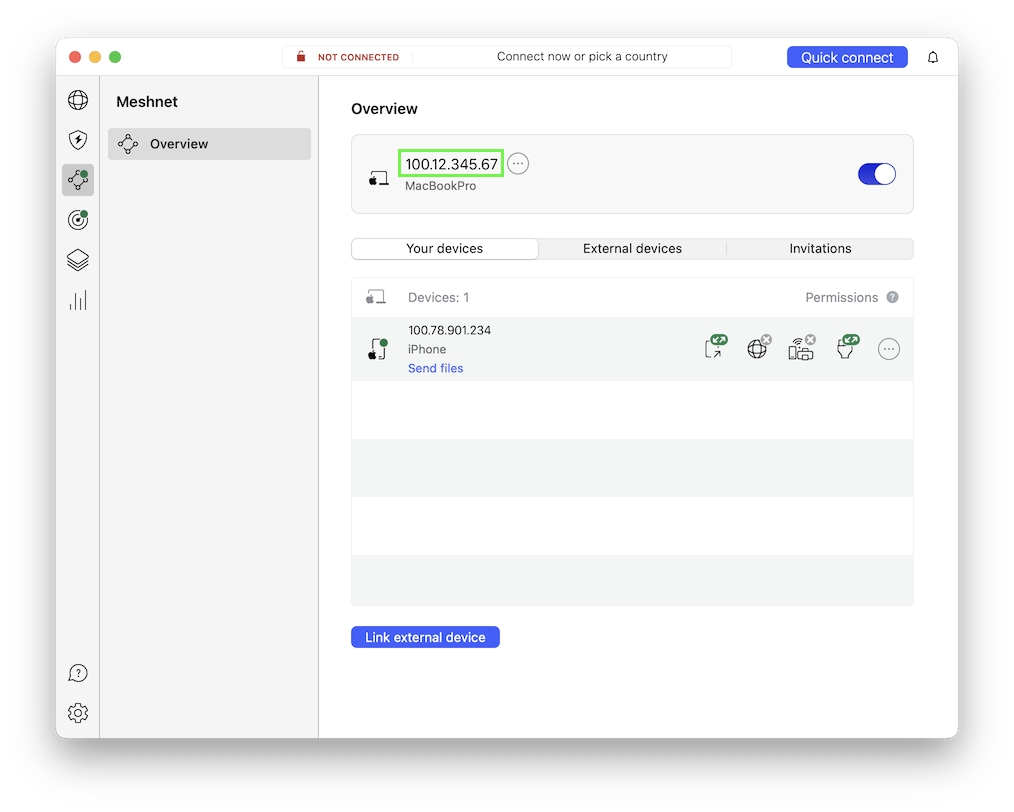
You’ll need this IP address to set up your connection in Screens 5.
Step 4: Create a New Connection in Screens 5
-
Launch Screens 5 on the device or computer you’ll be connecting from.
-
Select Custom Screens.
-
Click the button to create a new connection.
-
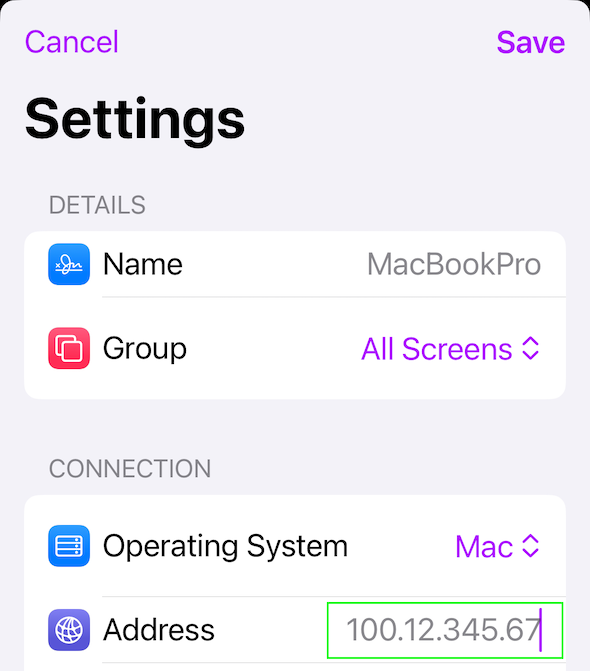
In the connection settings, enter the IP address you retrieved in Step 3.
-
Ensure the Operating System and Authentication Method settings are correct.
-
Enter your login credentials, or leave them blank if you prefer to input them at connection time.
Step 5: Connect
To connect, simply tap or double-tap your newly created connection.
By following these steps, you’ll be able to securely connect to your computer using Screens 5 with NordVPN Meshnet, whether you’re at home or on the go.
Before You Leave
Before heading out, simulate a remote connection to confirm that your computer is reachable from outside your network. This quick test ensures your setup will work properly when you’re away.