In order to use a manual configuration with Screens Connect for Windows, you need to follow three steps:
Note: manual configurations are only supported with Screens Connect for Windows version 3.5 and above. If you are using an earlier version, you can get the latest version here or click the Check for Updates... button in the Screens Connect settings.
Step 1: Set a static IP address
Your PC needs a static IP address locally in order for the port forwarding rule on your router to redirect to your PC.
To do so, please follow these instructions from PortForward.com.
You will need that IP address in Step 2.
Step 2: Manually Configuring Your Router's Port Forwarding Feature
This method will differ from one router to another, so we strongly suggest referring to the port forwarding guide at Port Forward. This guide includes detailed instructions for many router brands and models.
Here's how to proceed:
- Go to portforward.com
- Click on Home > List of all Programs
- Scroll down or search for VNC or SSH if you wish to use a secure connection
- Click on VNC (port 5900) or SSH (port 22), depending of the previous step
- Select the brand of your router (ex: Arris)
- Note: If you see an ad, simply click Close
- Select the router model (ex: BGW210-700)
- Follow the instructions
- Remember the public port number you have used for your port forwarding rule as you will need it in Step 3
For example, your port forwarding rule could use public port 4982, which will redirect to the IP address configured in Step 1 and to either port 5900 (VNC) or 22 (SSH), depending on which service you chose above.
Note: If you want to use a SSH connection, you need to configure a SSH server on your PC. You will find instructions here.
You can also find port forwarding instructions for these popular routers:
We will add more instructions in the future.
Step 3: Configure Screens Connect
Double-click on the Screens Connect taskbar icon to open the options window.
![]()
Click the Advanced tab.
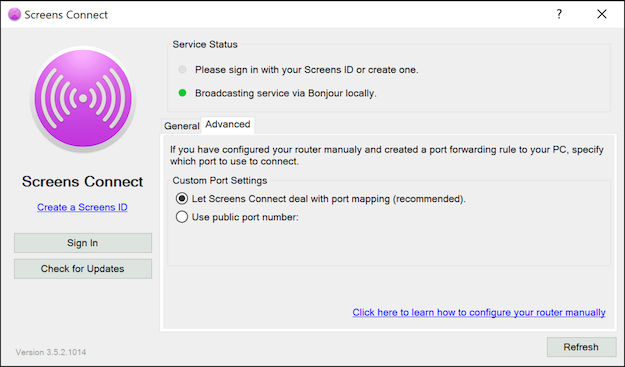
Select Use public port number and enter the public port number for the port forwarding rule you've created in Step 2.
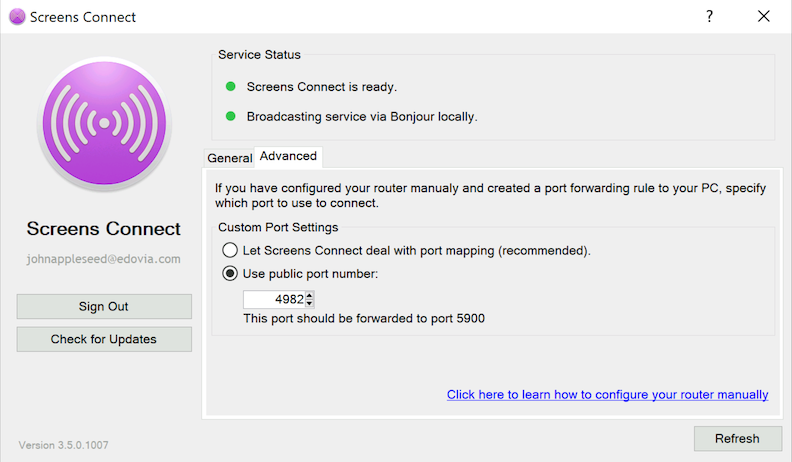
Here, we created a port forwarding rule on our router that uses public port 4982 which redirects to local port 5900 (VNC).
Click the Refresh button to update.
Screens should now be able to connect to your computer remotely!